Sunday, January 31, 2021

Fine Art Floral Funday Monday #25

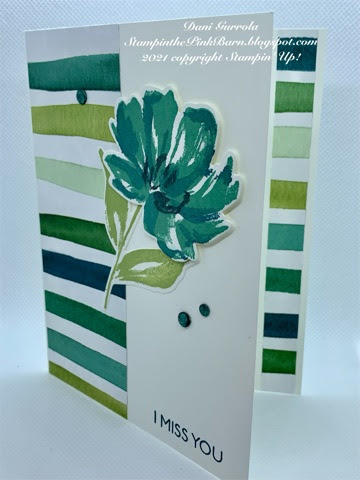
 I think I might have found my new favorite stamp bundle "Art Gallery" this is a two step stamping technique which I showed in an earlier post. I've been on a roll today with this stamp bundle. So let me show you what I've come up with. Over the next couple days I will post a new card using this stamp set, so come back often to see more. 


This first card is made is using the very rich Merry Merlot, which is one of the colors in the Fine Art Floral DSP. I added that fabulous Gilded Leafing to make this flower shine, with the added Gold Foil cardstock it really make this flower POP. The first layer, also in the Merry Merlot has been embossed with the Painted Textures 3D embossing folder to add that extra dimension to this card.


Recipe Supplies:
  • Art Gallery Bundle
  • Stitched So Sweetly Dies
  • Painted Texture 3D Embossing Folder
  • Gilded Leafing 
  • Stazon Jet Black
  • Versamark 
  • Merry Merlot Stampin' Pad
  • Old Olive Stampin' Pad
  • Heat & Stick Embossing Powder
  • Cardbase: Merry Merlot 8 1/2" x 5 1/2" scored at 4 1/4", and 5 1/2" x 4 1/8” (embossed layer)
  • Gold Foil Sheet: 3" x 3" cut in half twice to make 4@ 1/2" x 1/2" squares, and 4 1/4" x 3"(for layer under focal layer), scrap for die cutting sentiment, 1/4" x 5" (to add to the inside)
  • Focal Layer: Basic White die cut the largest scallop rectangle from Stitched So Sweetly
  • Fine Art Floral DSP: 2" x 5" and 5 1/4" x 1/2" (to add to the inside)
  • Inside: Basic White 4" x 5 1/4" 


Assembly Video


Assembly:
  1. Start with attaching the 1/2" Gold Foil squares 1/8" from edges to the card front on the cardbase.
  2. Take the 5 1/2" x 4" Merry Merlot and emboss with the Painted Textures 3D folder, attach this piece to the cardbase, over the gold pieces leaving an 1/8" of the gold showing.
  3. Attach with dimensionals the Fine Art Floral DSP 2" x 5" to the left front aligning your margins.
  4. Lets do our stamping, grab the focal Basic White rectangle, with the fuller flower head use Merry Merlot and stamp towards the top, add the stem with Old Olive. With the less full flower head use the Versamark and stamp on flower
  5. Sprinkle the Heat & Stick Embossing powder, grab your heat tool and heat (this will only take seconds, be very careful, if over heated it will not be sticky)
  6. Start placing the Gilded Leafing on the sticky embossed areas, once covered take a brush and wipe off excess. Look at that Awesomeness!!
  7. Attach the stamped rectangle to the Gold Foil 4 1/4" x 3", put dimensionals only on the side touching the Merry Merlot and glue the other side to the DSP (this will keep the focal piece level)
  8. Take the Gold Foil scrap and stamp sentiment in Stazon ink and die cut. attach with mini dimensionals. 
  9. Glue the DSP and Gold Foil to the right side of the Basic White inside piece (shown above)           

You'll find a Ingredients list below - you can click on any of the products to see the details and go right to my Stampin' Up! store:

Ingredients List: 


What's Going On

Check out the details here:

   CURRENT HOST CODE:

Use this host code below to place your online order if it's under $150 and you'll get extra perks from me! If your order is over $150 DO NOT use the code - you'll still get perks from me and you'll get your own Stampin' Rewards from Stampin' Up! Just copy/paste this code: EY2AKYUY  when placing your order

FB Live Every Monday @6pm

Click image:


Calling all CHICKSHey Chick! Have you seen the Hey Chick and Hey Birthday Chick Bundles? They crack me up. If you’re looking for fun and unique images and sentiments for your crafting projects, you’ve got to take a look at these onesClick Here


Butterfly FrenzyBring in the beauty of nature with the artistic designs of the Butterfly Brilliance Bundle and coordinating designer series paper, along with textured specialty paper that will put a pop of brilliance on every project. Exclusive early release March 2 through May 3, 2021!! Click here  for PDF flyer.

SHOP WITH ME:  ONLINE STORE


Paper Pumpkin monthly kit - subscribe today - click here: PAPER PUMPKIN

Download the 2021 Spring Mini Catalog: JJ MINI CATALOG

Download the Sale-A-Brations Catalog SALE-A-BRATIONS CATALOG 

Download the 2020-2021 Annual Catalog ANNUAL CATALOG


Thank you for sharing your time with me

Dani


Stampin Cut & Emboss Machine


Creating die cuts and embossed designs is easy, thanks to Stampin’ Cut & Emboss! Our die cutting and embossing products do the work so you can have the fun.
Our Stampin’ Cut & Emboss and Mini Stampin’ Cut & Emboss Machines offer multiple die cutting and embossing options for you to share with all- from beginners to seasoned crafters. Both of our Stampin’ Up!-exclusive machines offer the highest quality and make precise cuts and detailed embossed images every time. They’re also simple to store and easily portable, which makes packing for crafting events a cinch! They come with all the tools needed to get started right away, making it easy for you to have a fantastic die-cutting and embossing experience from the start.


So are you in love with this machine yet? Let me tell you what sets our machines apart from the rest? Here are some of our favorite features:


  • Durable machines with high-quality results. The solid steel construction frame and rubber feet that securely grip the work surface produce crisp, clean, precise cutting and beautifully detailed embossing.
  • Easy to use. The machines and tools are designed for an intuitive die-cutting and embossing experience. For example, all plates are labeled with a number and are color coded for easy reference and use when building your sandwich. 
  • Simple to store. The platforms on both machines fold for space-saving storage and they look pretty too–the sleek, clean design suits any crafting space.
  • Portable. You can use both machines at home or on the go with their folding platforms and ergonomic carrying handles. It’s also convenient for you who like to attend crops or other crafting get togethers.

You'll find a Shopping list below - you can click on any of the products to see the details and go right to my Stampin' Up! store:


Now that you own this Fabulous Machine, how do you use it? Let me show you a couple of videos that Stampin' Up! has made to teach you the step by step ease of the cutting and embossing so you can get started with your crafting.

Embossing Sandwich Video:


Die Cutting Sandwich Video:


What's Going On:

Check out the details here:

   CURRENT HOST CODE:

Use this host code below to place your online order if it's under $150 and you'll get extra perks from me! If your order is over $150 DO NOT use the code - you'll still get perks from me and you'll get your own Stampin' Rewards from Stampin' Up! Just copy/paste this code: EY2AKYUY  when placing your order


FB Live Every Monday @ 6pm

https://www.facebook.com/danigurrola.stampinup.net/

Check out the Paper Pumpkin monthly kit - subscribe today - click here: PAPER PUMPKIN

Click here to see the JJ MINI CATALOG

Click here to see the SALE-A-BRATIONS CATALOG 

Click here to see the ANNUAL CATALOG


Thank you for sharing your time with me

Dani


Saturday, January 30, 2021

Sale-A-Brations


Still confused on what all this Sale-a-Brations talk is all about?? Well here's a Stampin' Up! Video to help understand how it works.


Two Step Stamping


Take a look at this Beauty, aren't these colors just stunning? So lets talk a little about Two-Step Stamping, It simply means using two or more stamps to create one image. 

There is some questions as to whether Stampin Up actually invented the term, and thankfully, it's doesn't matter. 

It's Brilliant!

When it comes to the outcome, it usually means more texture, more color, more depth – all by using the same stamps and inks that we use for everyday paper crafting.  No crazy art skills needed. So let me tell you how its done.


The flower head is created using –

  • Just Jade ink for the first stamp. And, then
  • Pretty Peacock ink for the second stamp.
  • Pear Pizzazz for the stem 


Recipe Supplies:

  • Art Gallery Bundle- JJ Mini Catalog
  • Cardbase- Basic White Thick 8 1/2" x 5 1/2" scored @ 4 1/4"
  • DSP Layer- Forever Greenery 2" x 5 1/2" and 2 @ 1/2" x 5 1/2" (these are for the inside and envelop)
  • Scraps of Basic White for stamping and die cutting


 Assembly Directions:
  1. Lets start with our stamping (so it will be dry when we go to use it) grab a Basic White scrap big enough for the flower head,  use the first flower head (the fuller stamp image) and stamp in Just Jade. 
  2. Now use the second flower head (this is the lesser image) and stamp the Pretty Peacock. (Optional to use the flower stamen in Tuxedo Black Memento ink) WOW that was the hard part!!😉
  3. On another scrap of Basic White stamp the stem in Pear Pizzazz
  4. Attach the Forever Greenery DSP to the outside left of the cardbase.
  5. And go ahead and attach the 2 strips of DSP one to the inside right and one on the bottom of the front envelop (I like to leave a little white showing on the outter edge)
  6. The ink should be dry now, so go ahead and die cut the flower head and the stem.
  7. Attach the stem down directly to the card, add your Dimensionals to the flower head and place onto the stem.
  8. On to the finishing touches, use your Pretty Peacock Stampin Blend to lightly color over a 3 of the Elegant Faceted Gems, attach staggering on the card. Grab that shimmery Wink of Stella and brush over the flower head. Congratulations you just completed this Beautiful card!


You'll find a Ingredients list below - you can click on any of the products to see the details and go right to my Stampin' Up! store:

Ingredients List:


What's Going On:

Check out the details here:

   CURRENT HOST CODE:

Use this host code below to place your online order if it's under $150 and you'll get extra perks from me! If your order is over $150 DO NOT use the code - you'll still get perks from me and you'll get your own Stampin' Rewards from Stampin' Up! Just copy/paste this code: EY2AKYUY  when placing your order


FB Live Every Monday @ 6pm


Check out the Paper Pumpkin monthly kit - subscribe today - click here: PAPER PUMPKIN

Click here to see the JJ MINI CATALOG

Click here to see the SALE-A-BRATIONS CATALOG 

Click here to see the ANNUAL CATALOG


Thank you for sharing your time with me

Dani